Secrets, secrets……..
What an intriguing title eh?!
Well, when thinking about my blog work this month, I decided that I would cover hidden journaling – as an A4 scrapper, the smaller paper surface means I often find it hard to include the all-important story without compromising my design, so I often turn to hidden or secret journaling to ensure my story is documented within the page.
However, there’s a bit more behind my title too…….
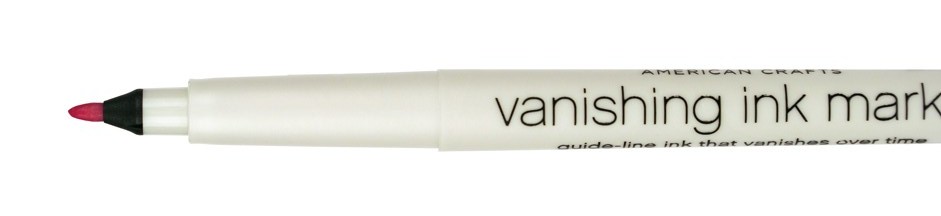
When my order arrived, it contained this little vanishing ink pen. I was confused by its arrival as I was sure I hadn’t ordered it…..however the mystery was soon solved when I realised that one of the fantastic new functions of the shopping cart on the revamped shop website is that it keeps anything you place in your bag until you check out, even if you don’t make a purchase on that day, and pop back in between. Before the new site went live, the DT had a little play and test – and I must have randomly added the pen to my shopping cart when trying all the new features out…and forgotten about it! So I set about thinking of ways my little “surprise” could help me in my crafting…..
Some of you may know that 2013 is going to be a pretty big year for me, as this Summer I’ll be saying “I do” to the very lovely Mr T. The countdown is flying past, plans are in full swing, and I feel it’s important to document all our hard work and preparation along the way to look back on in the future. My first page this month is about our Save the Dates, and what a massive project they became!


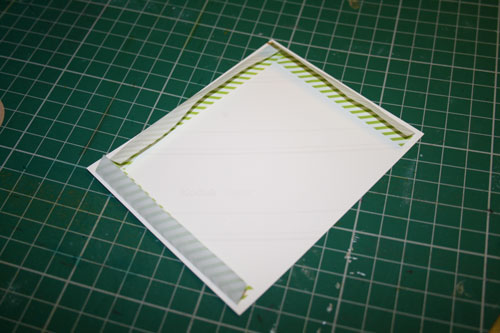
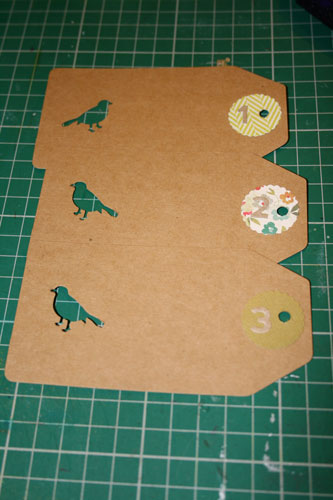
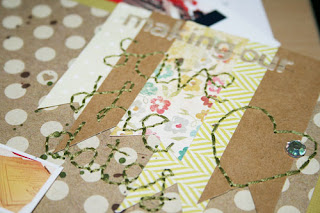
I placed the folded strips on the back of my photo, leaving one edge free to pop my tags in, and then stuck it straight onto my page – one side of the washi providing the adhesive. The three sealed edges now created a pocket to hold my tags in place.
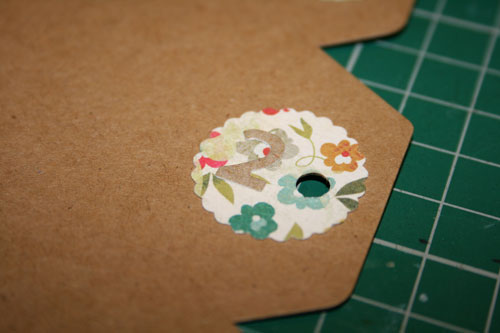
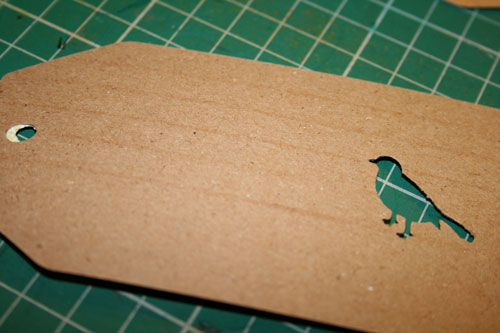
I decorated the tags by punching a bird shape from them, then adding a circle of patterned paper and a number from a packet of Jillybean Kraft alphas to each to indicate the order they should be read.
The next step was the first time my vanishing ink marker came into play – to draw guide lines for my journaling on the back of each tag. The pen worked great – although I did find I had to work quickly as it doesn’t take long for it to disappear.
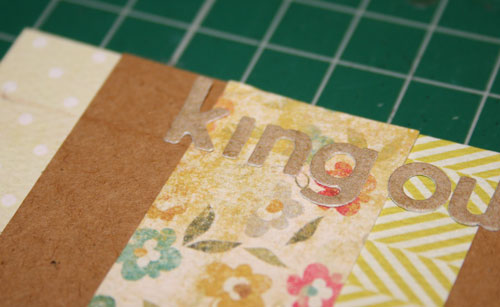
I also used it to draw a guide line to use the stickers in my title;
as a guide for creating a stamped border;


And to compl
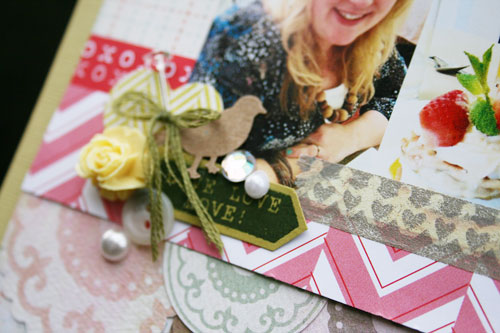
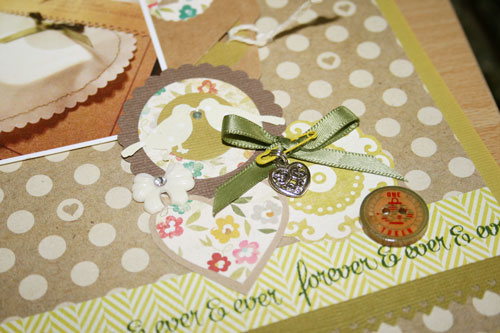
ete the page, a little cluster of embellishments made from punched shapes using the papers, a Jenni Bowlin resin bow, a Basic Grey wooden button and some ribbon.
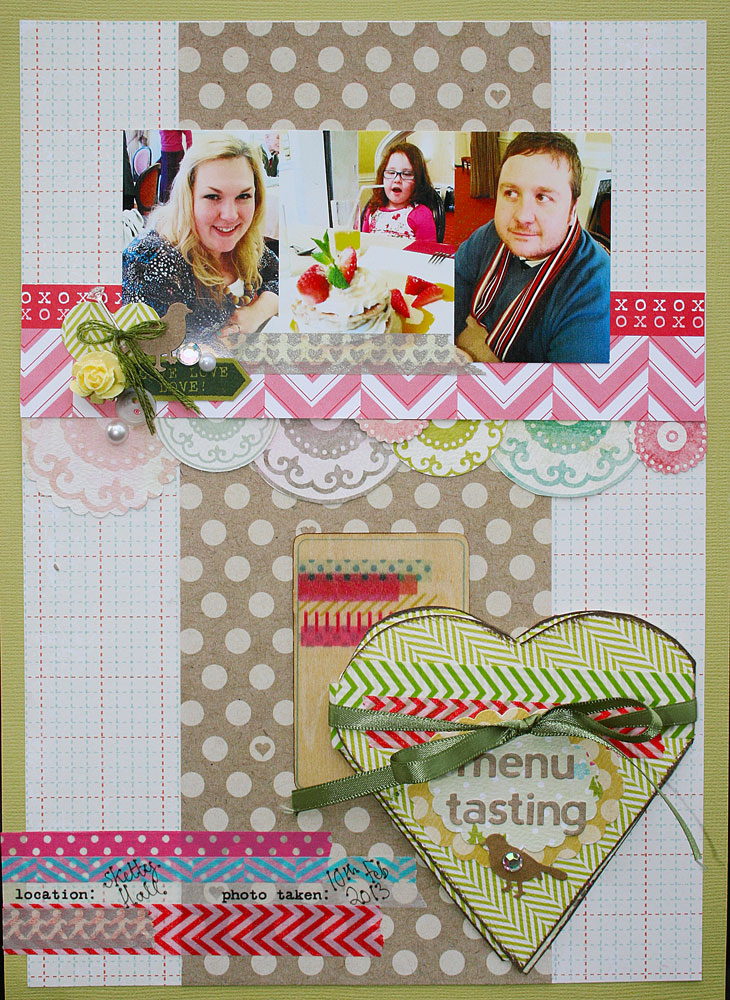
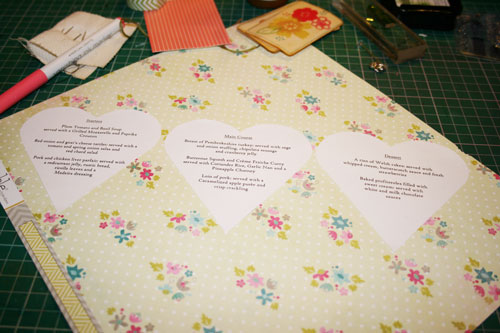
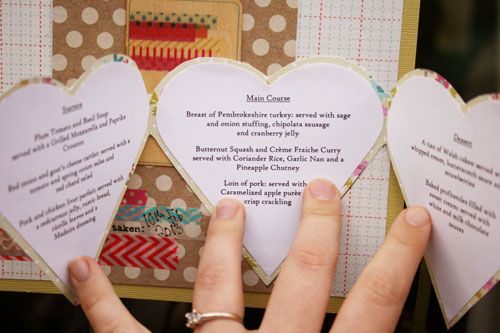
My second page documents the menu tasting afternoon we had….it took forever to whittle down the beautiful menu to just three choices, but we got there eventually!
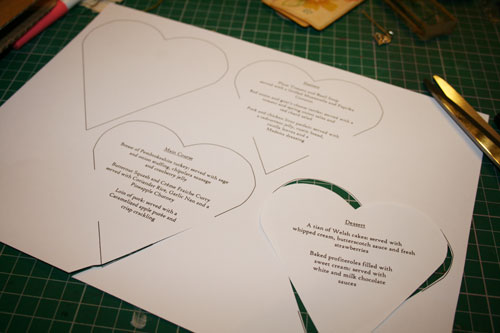
I then stuck them in a line on to some of the patterned paper, using the vanishing ink to make guide lines to ensure they were all straight – if they weren’t lined up they wouldn’t sit neatly in a pile on my finished page.

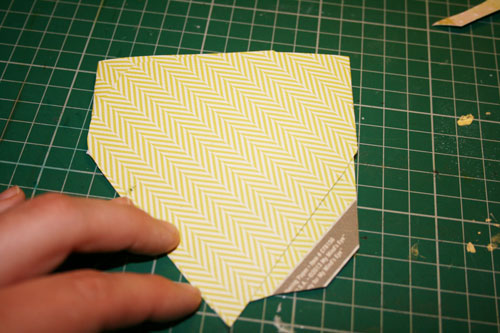
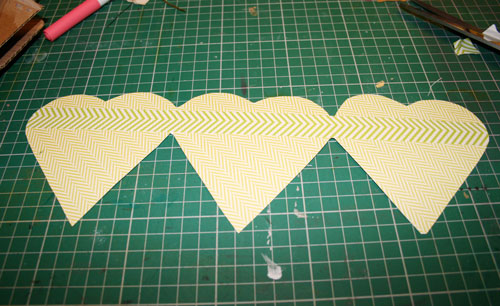
Once I’d folded the two outer hearts inwards on top of the centre one, I trimmed any visible excess paper and cut the tops all together – this made sure that the heart would look like one neat shape on my layout.
Flipping the journaling over, I ran a strip of washi tape right along the back across where the folded creases were between each heart to provide a bit of reinforcement for them.
I attached it to my page and decorated the front with my title and a bit of ribbon to hold the journaling shut.
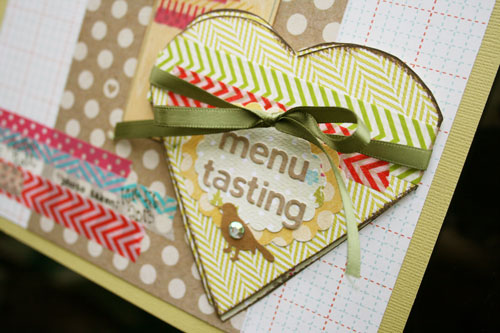
You can just see one of the new Amy Tan Veneer shapes peeping out from behind the heart – I must confess I’d actually ordered them for my March blog post, but they arrived when I was making this page and when I saw this tag, I thought it was perfect for tying all the colours in the layout together and acted as a nice visual anchor for the heart.
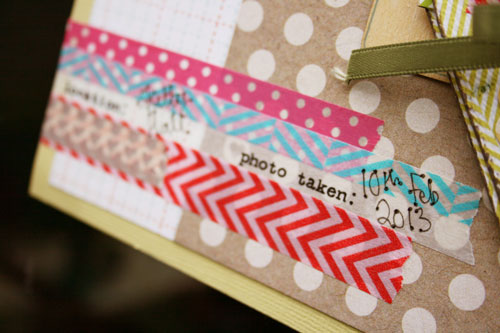
It also provided some inspiration for my date and location information at the bottom left hand of my page, which I created by layering lots of different washi tapes on top of each other.