Project Life and The Fuse
Hello, Jo here with my July creative team blog post. This month I’ve been trying out the WRMK Photo Sleeve Fuse Tool, I couldn’t wait to get my hands on it and I know it’s been very popular with you too as it’s been flying out the door. (Don’t worry, more are on order and will be in very soon, just sign up for a notification and you’ll receive an email when it’s back in stock).
So, for those who haven’t got their hands on it yet, let me introduce you to the WRMK Photo Sleeve Fuse Tool, ta-da!

In the package you will receive the fuse tool with a UK plug, a metal ruler stencil, a stand (for when the tool is hot) and two tool attachments; a fuse tip and a cutting tip.
Using it is simple; insert your fuse tip into the tool by screwing it in, place the tool on the stand, plug it in and wait for 10 minutes for it to heat up to the right temperature. (These 10 minutes are pretty crucial because unless it’s at the right temperature it won’t melt both sides of the photo sleeve and therefore won’t fuse them together properly). Place the stencil part of the metal ruler (the groove) where you want to fuse the layers together and apply steady pressure as you roll the tip along the groove at a swift pace. That’s it, done. One thing to note is that you are recommended to use a heat tolerable surface (such as a glass mat) and a piece of paper under your photo sleeve. I don’t have a glass mat, so I used a metal plate from my die-cutting machine with a piece of paper on the top.
Here it is in action creating a hidden fused pocket to hold sequins and a cork embellishment sandwiched between two chipboard frames within a Project Life spread.

1. Place a chipboard frame under your photo sleeve as a guide and use the tool to fuse together three sides of a pocket, making sure the fuse lines will be covered by the chipboard frame.

2. Insert sequins and a cork embellishment into the pocket and seal the top with the fuse tool.
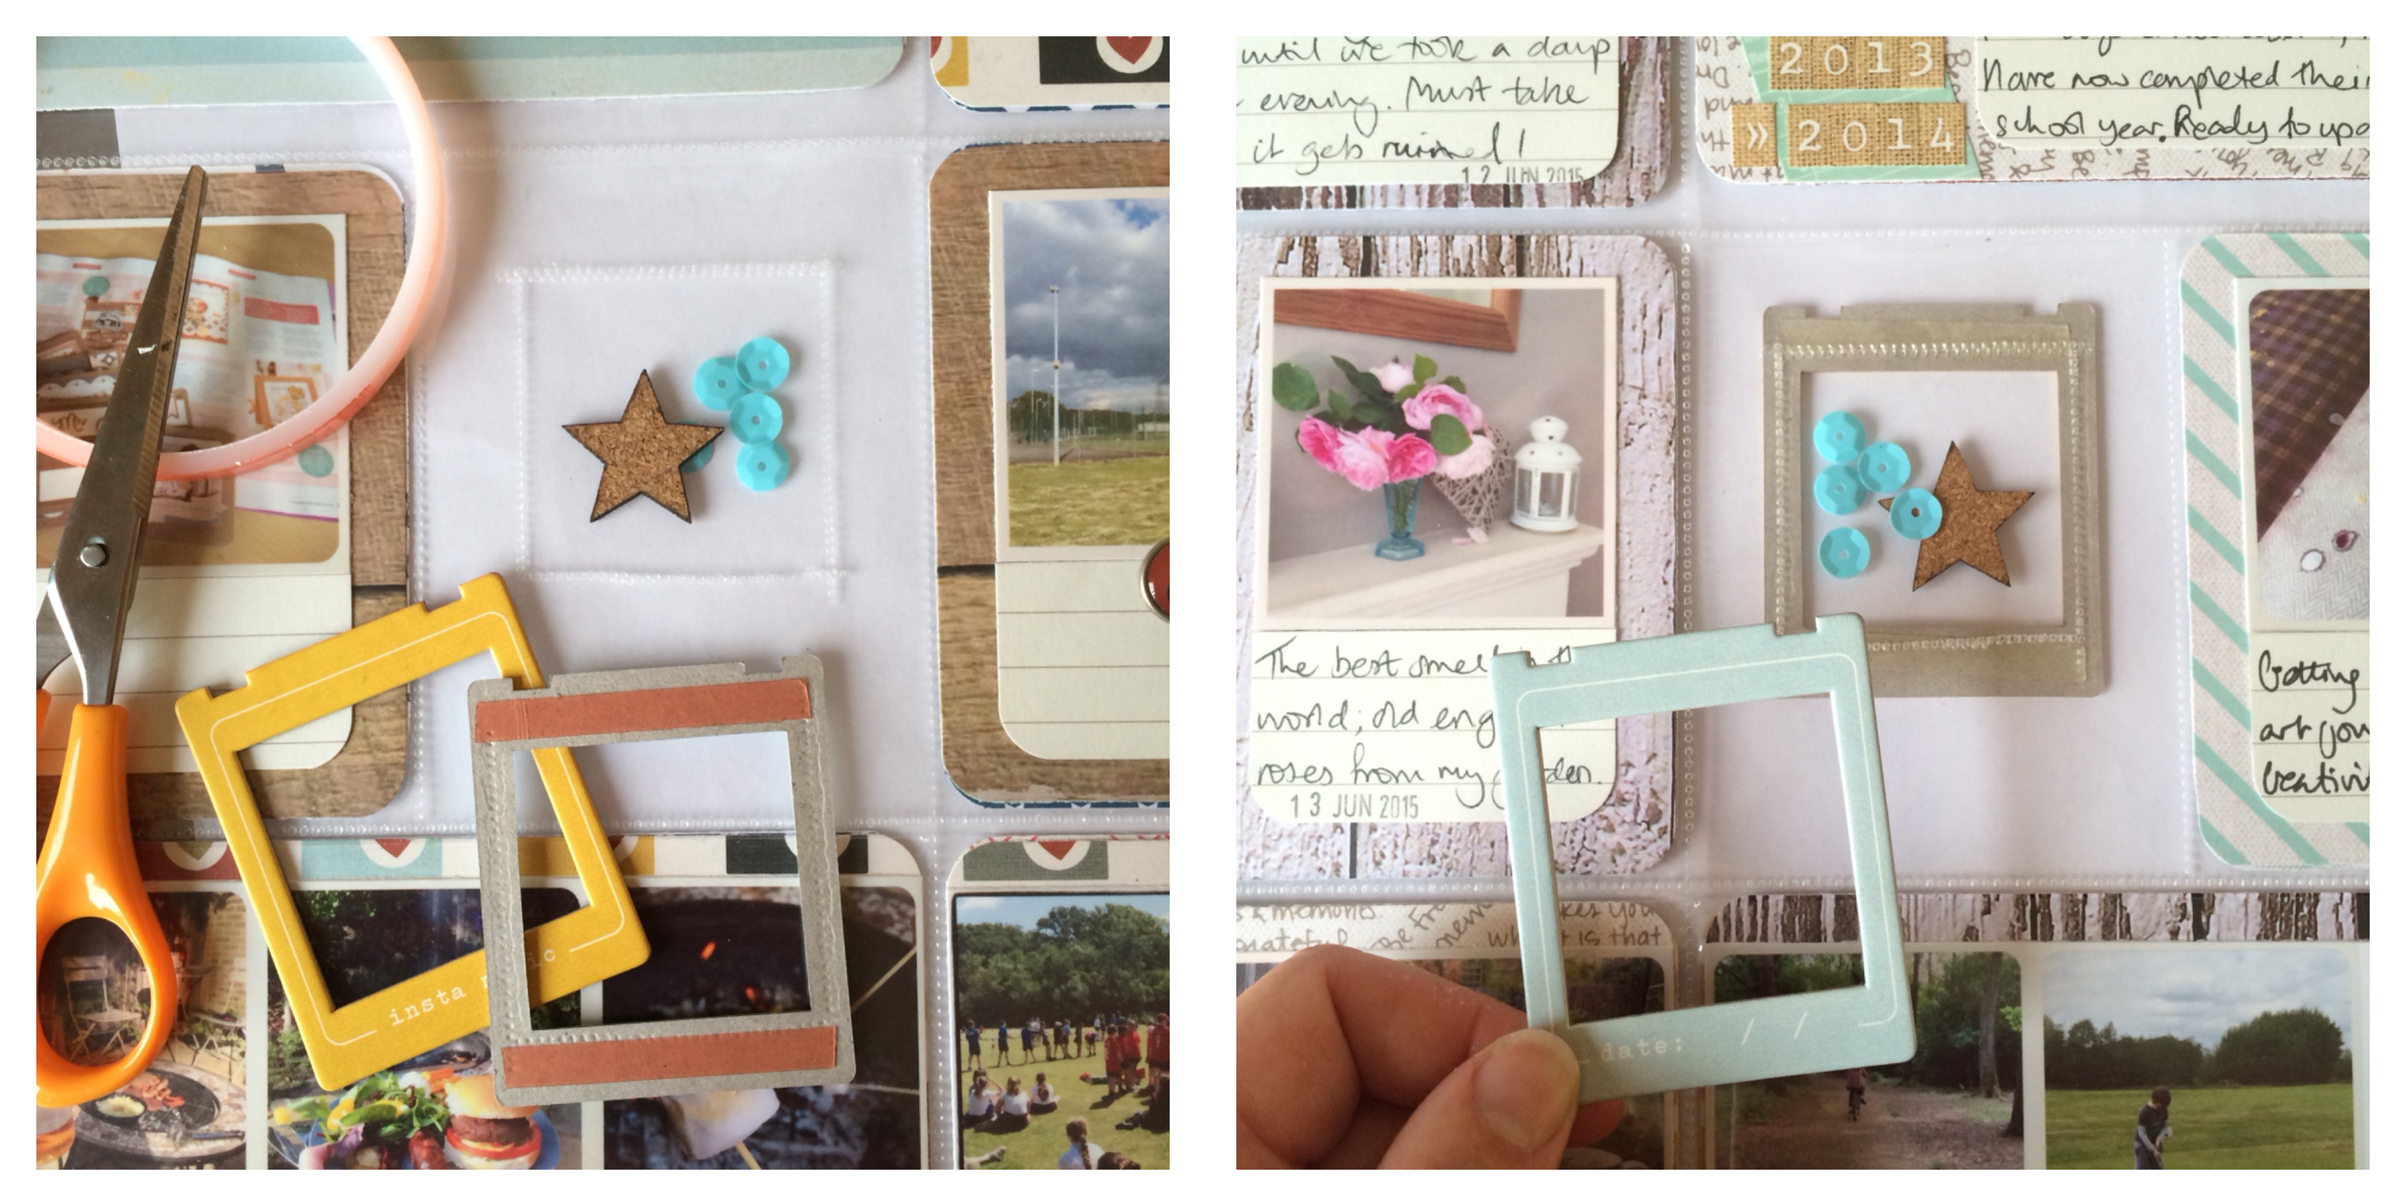
3. Add double sided tape to the chipboard frames and stick them into position so that they cover the fused lines and each others backs.
And here’s how it looks in situ between the other project life spreads…


I made another one for the other side of my spread as I had a couple of 3×4 pockets without photos that particular week. I love how you get a glimpse through to the weeks either side. Of course you don’t need to use chipboard frames, you could just fill the 3×4 pocket with sequins, wood veneers or ephemera and simply fuse the top to keep them contained.
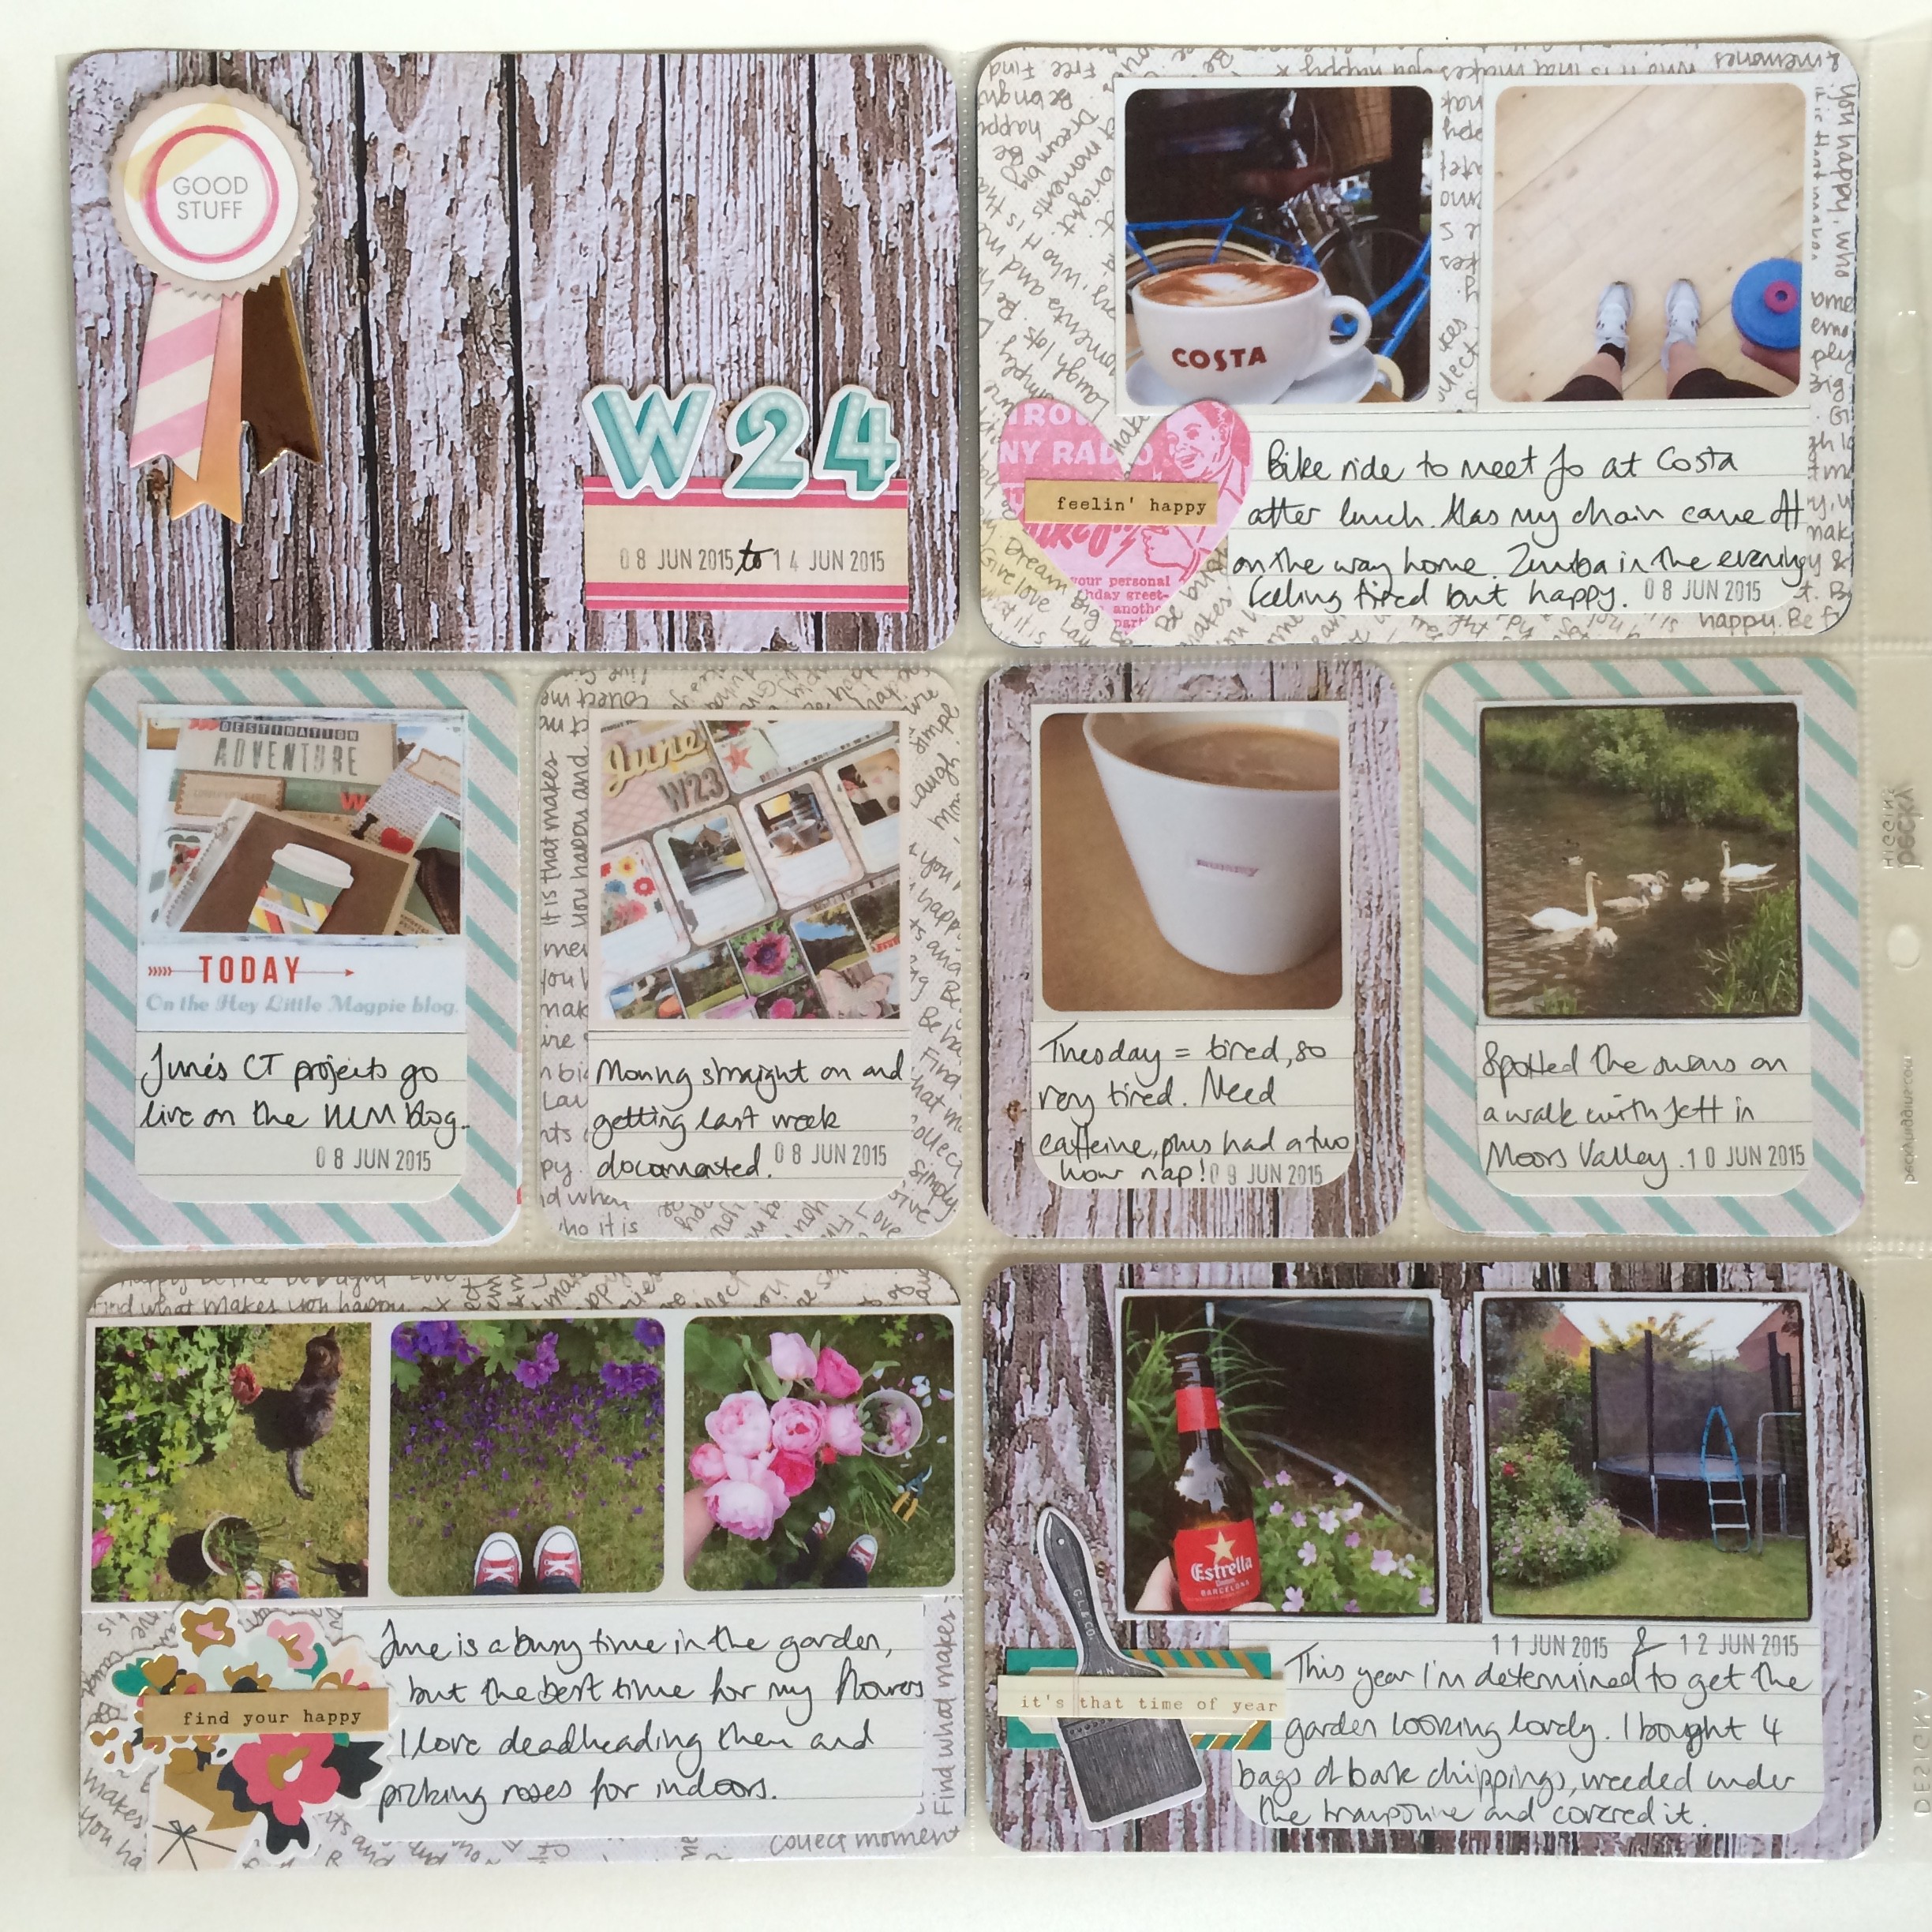
Let me share with you some Project Life spreads so that you can see the overall picture of how it looks, starting with week 24. For this week I used this fabulous woodgrain paper by Chickaniddy Crafts ‘Picnic Party’ from the Yippee collection. The single sheets are no longer available but the 12×12 paper pack contains it and is still in stock. I combined that with two papers from Crate Paper’s Craft Market collection ‘Hardcover’ (words) and ‘Process’ (stripes). I decorated the spread with thickers, chipboard shapes, ephemera die cuts, stickers and word stickers all from the Craft Market collection. The journaling spots are trimmed down Project Life cream lined journaling cards and I’ve used them on all three of the spreads shown here.


Moving on to week 25. For this week I used the Simple Stories ‘Say Cheese II’ collection. Trust me, you don’t need to have Disney related stories and pictures to use it! I used the papers ‘Laughter’ (blue lined) and ‘Photo Op‘ (cameras) for the 4×6 inserts and paired them with the ‘Hardcover’ paper by Crate Paper from the previous week and ‘Jubilee’ (woodgrain) paper from Maggie Holmes’ collection ‘Confetti’, which I went on to use for week 26. The reason I used papers from the previous and following week was to co-ordinate them, this way the inserts showing through the see-through pockets worked with those used in this weeks spread. The thickers used are from the Maggie Holmes Confetti collection, but all the other embellishments are from the Simple Stories ‘Say Cheese II’ collection. These include ‘Bits & Pieces’, chipboard frames and self adhesive bradz.

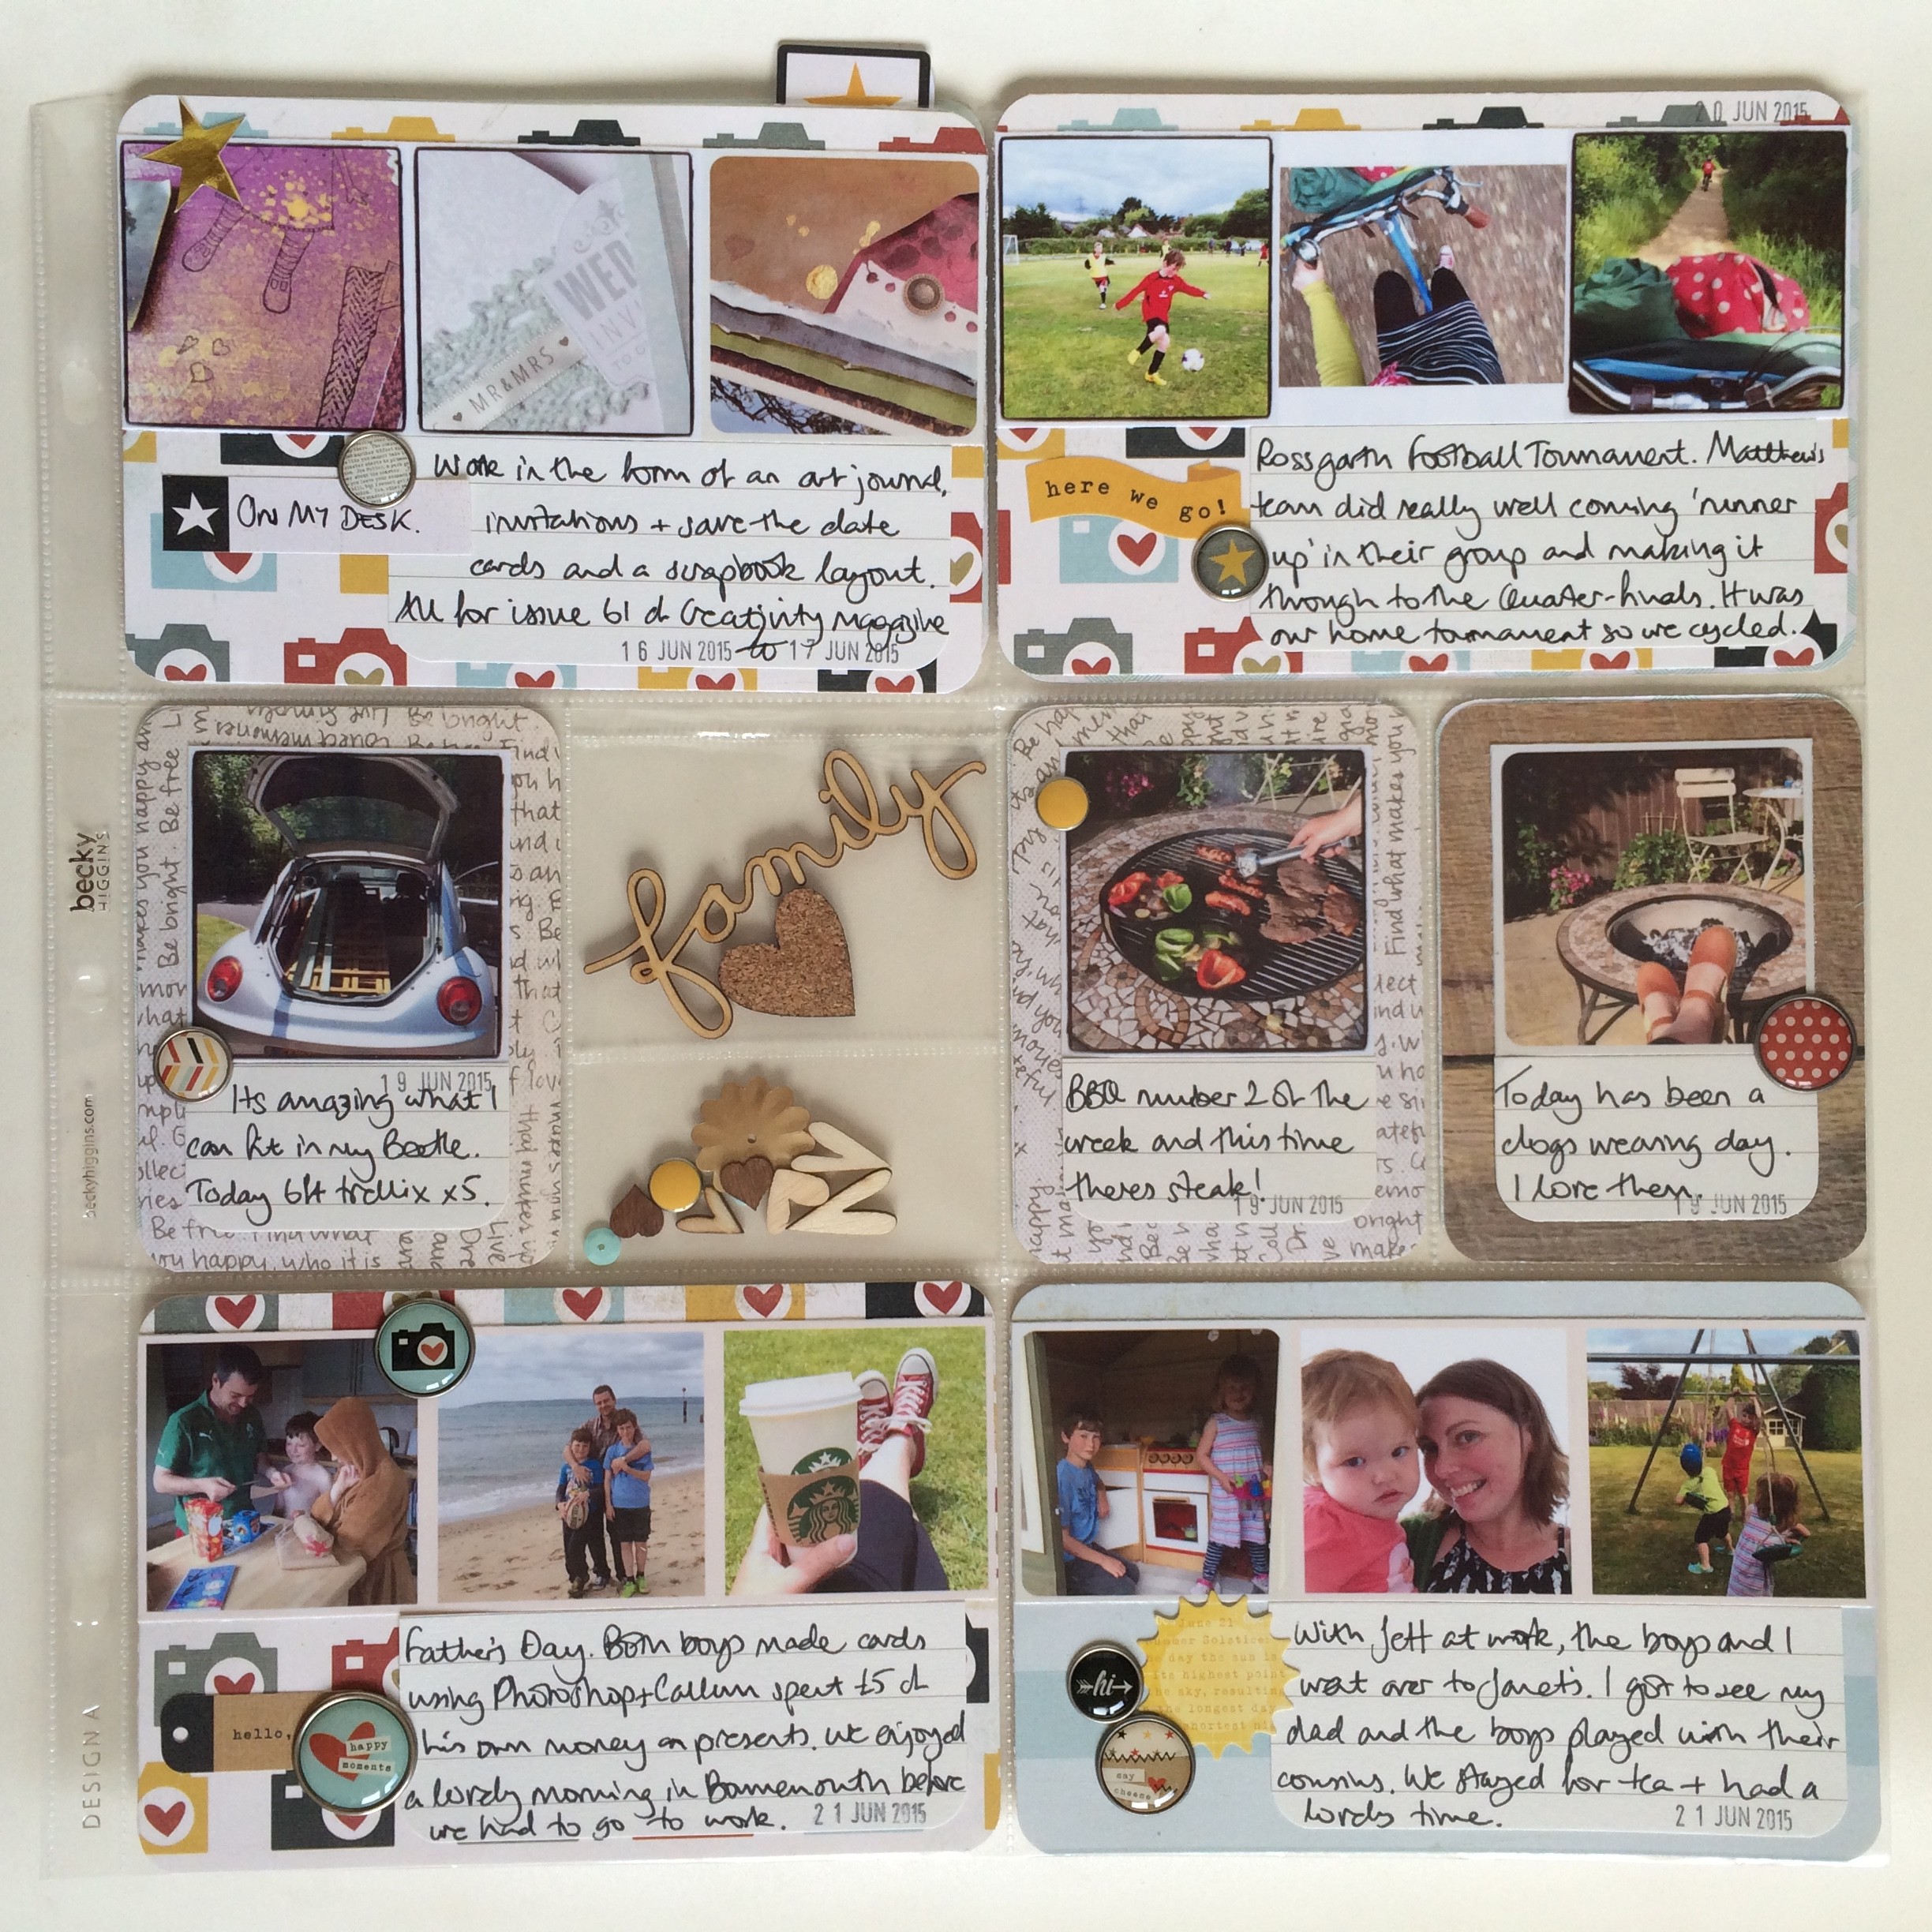
For the fused pocket on this side of the spread I opted to part fill it with some wood veneer hearts from my stash (these are a mixture of old Studio Calico and Freckled Fawn, I think), self-adhesive bradz (stuck back to back) and sequins from the ‘Confetti’ collection. I then sealed them in the lower portion of the pocket, in line with the bottom of the adjacent photos. Into the top portion I put a cork heart and a wood veneer word, both by Freckled Fawn and sealed the top of the pocket with the Fuse tool.

Through that transparent pocket you can glimpse what will be the final week, week 26 in my first Project Life album of 2015, I fill two albums per year. For week 26 I mainly used the new Poolside collection by Crate Paper. This includes the spotty paper ‘Sun-N-Fun’, chipboard shapes, cardstock ephemera die-cuts, and stickers. I paired the spotty paper with the woodgrain side of the ‘Jubilee’ paper from Maggie Holmes’ Confetti collection and used the gold foil letter and number stickers from the Confetti collection too.


I love the soft colours in the Poolside collection, it goes so well with the other Crate Paper collections and as you can see there’s nothing swimming related in my spread, so just like the Simple Stories ‘Say Cheese II’ collection it’s more versatile than you’d think!

Thanks for stopping by…
