Pebbles/Jen Hadfield – Simple Life
Hi Magpies, Jackie here with my blogpost for this month. This month I’ve chosen the lovely collection from Simple Life by Jen Hadfield/Pebbles, there are always collections in the shop that I over look at first, but then when I come across them, I think why hadn’t I seen these before and into my basket they pop.
So let get on and stop my rambling, my first layout / mini album – didn’t start like this, but I loved how it turned out.
I had an idea to scrap-lift one of my previous layouts, but didn’t check the size of the photographs I’d used. So I ended up printing all the photographs too large for what I wanted to do, so decided to go off in a completely different direction and product a mini photo album that I adhered to my layout.
Safari Park Adventure …

The layout uses a few strips of the various patterned papers and some ripped vellum in the centre of the kraft cardstock.
Then I constructed the album.

Using 2 strips of 12 x 4 inch white cardstock, I scored each strip as follows
One scored at 3, 6, 9 inch intervals.
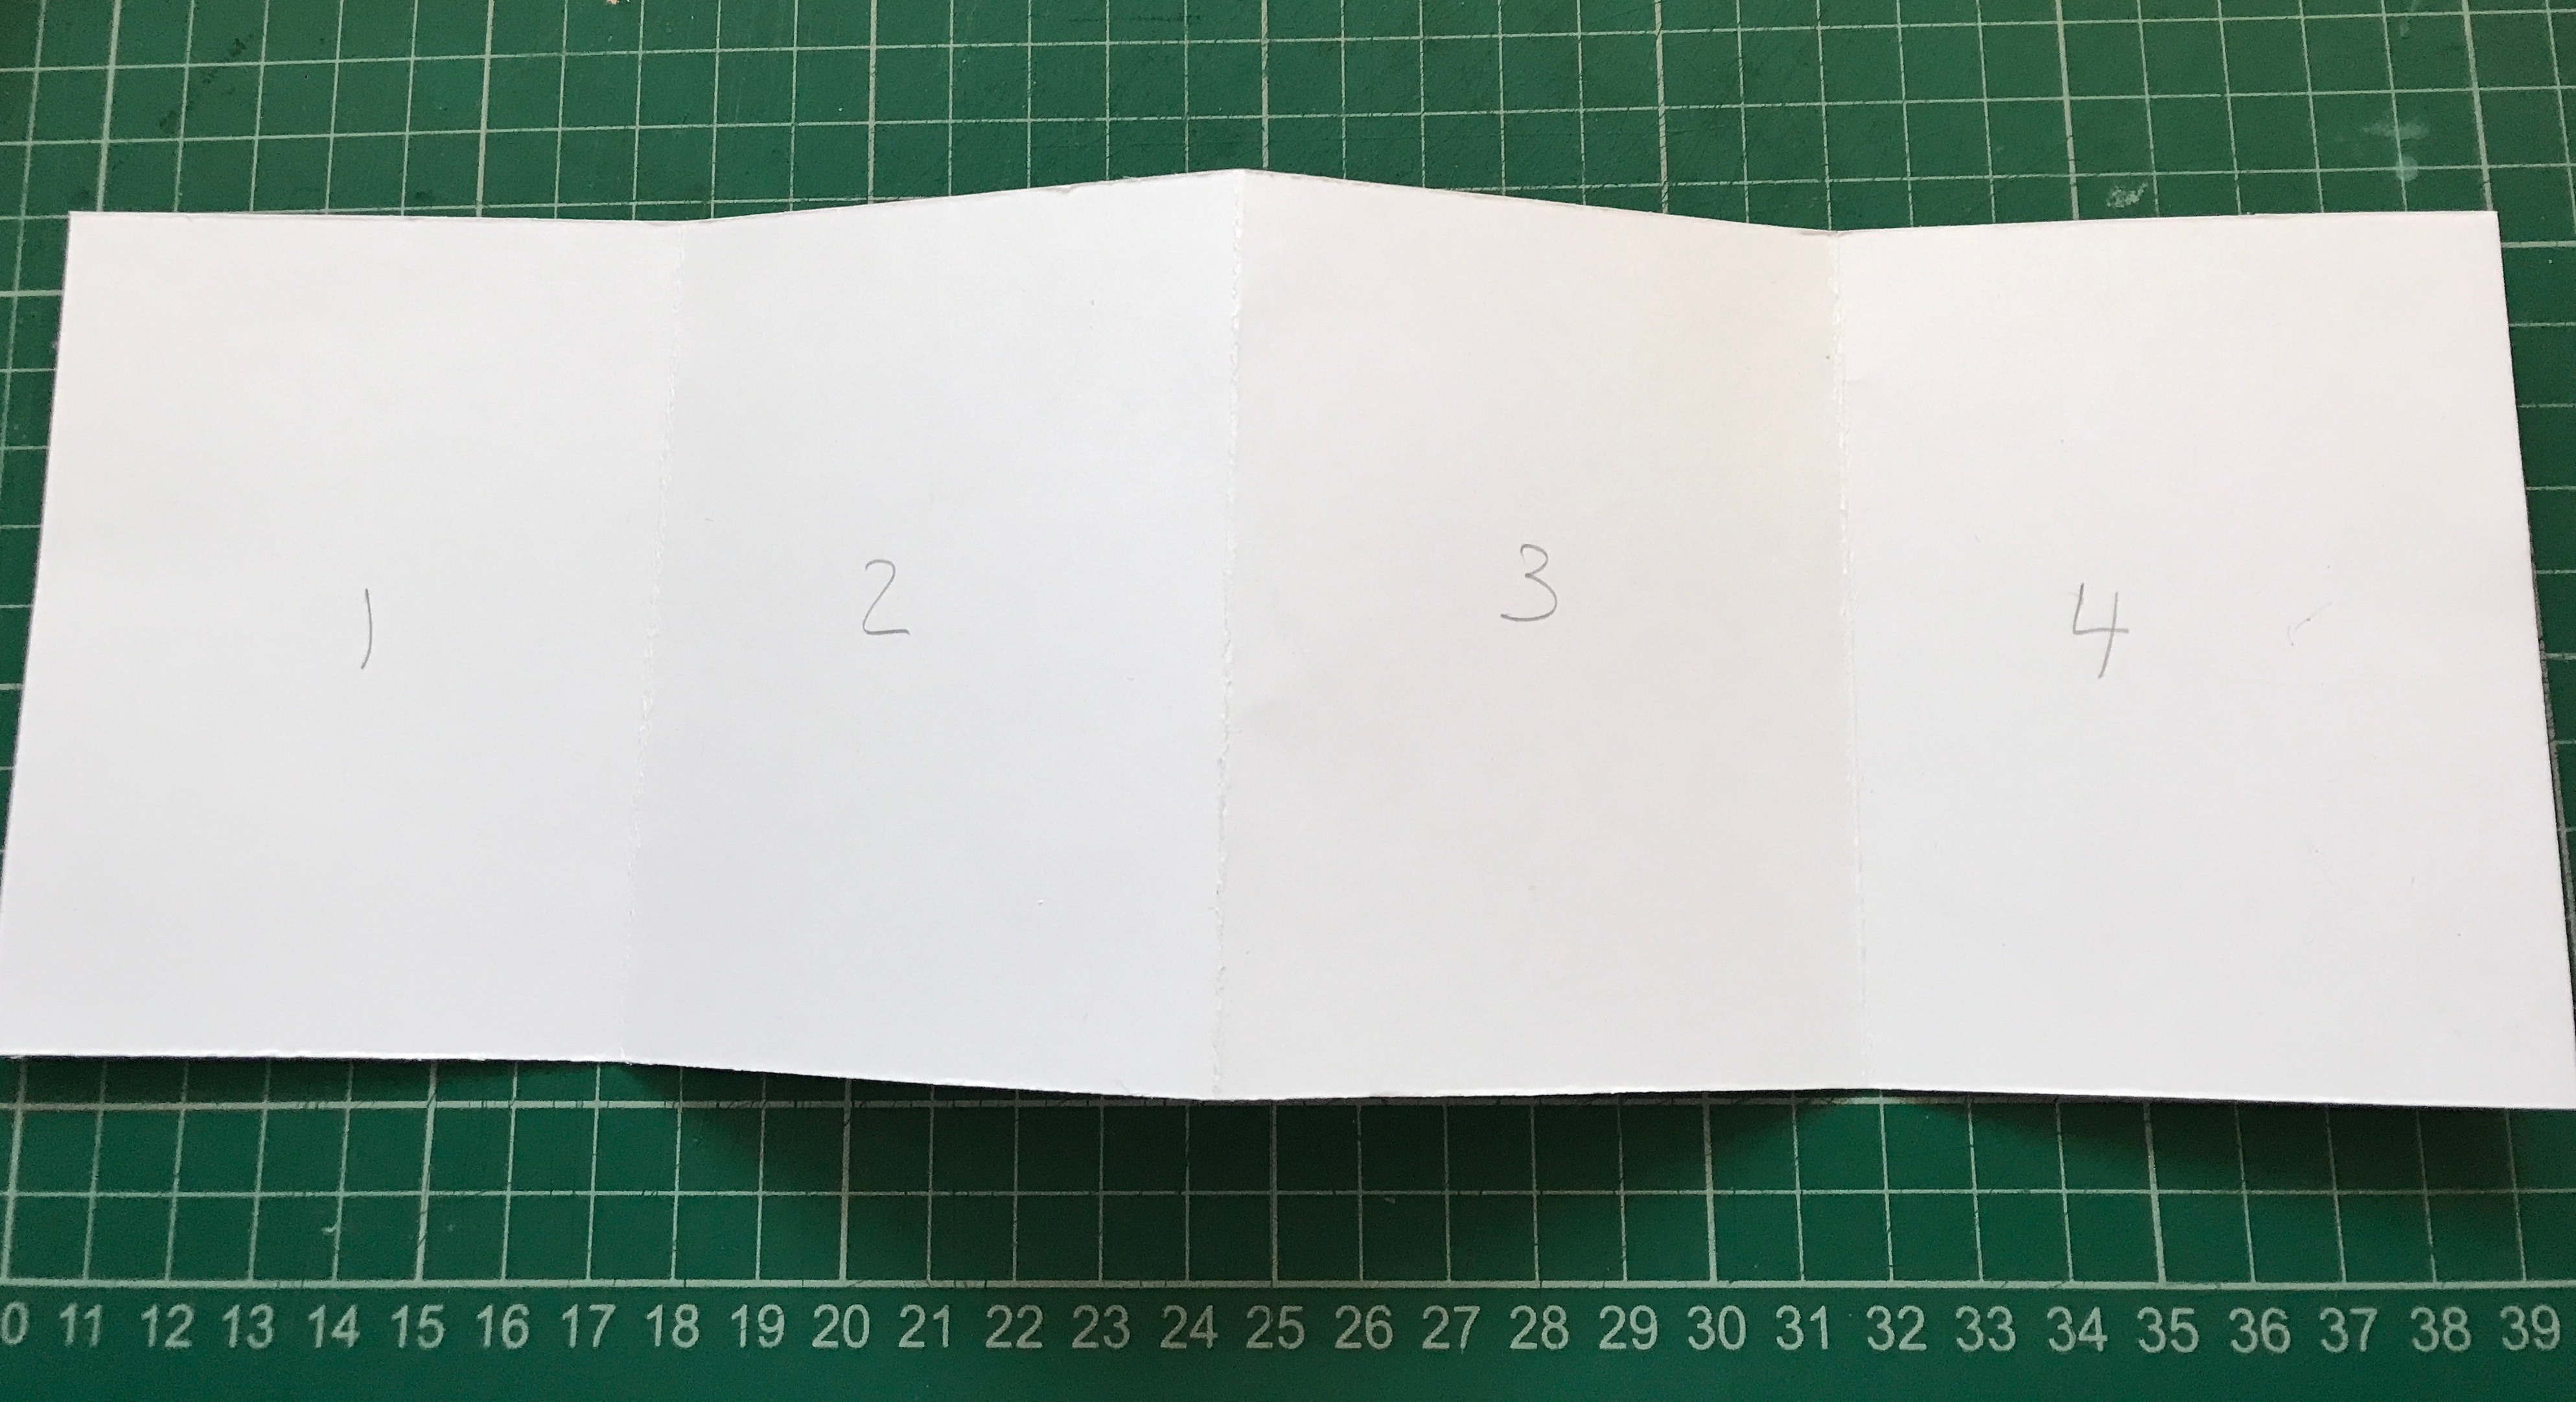
and the 2nd one at
0.5 inches, 3 inches, 6 inches, 9 inches, leaving you with a 2.5 inch piece at the end.

Fold both strips into a consortina style.
Add the 0.5 inch piece to the 1st strip – I’ve marked as No. 4 – see photo.

No. 4 becomes the base of the mini album.
As I knew I was going to add patterned paper to the base, I numbered each one, then folded like this
5 on top or 4
3 on top of 6
8 on top of 2
8 is the 2.5 inch piece – that I’ve added the journalling card on top of (see below).

Using some patterned papers from the Pebbles/Jen Hadfield Simple Life collection, I added to the base of each piece and added photos on top.

Using the Pink Fresh Studio – Stamp set, I stamped using green ink and cut thme out, adding them to the bottom of 3 of the photographs.
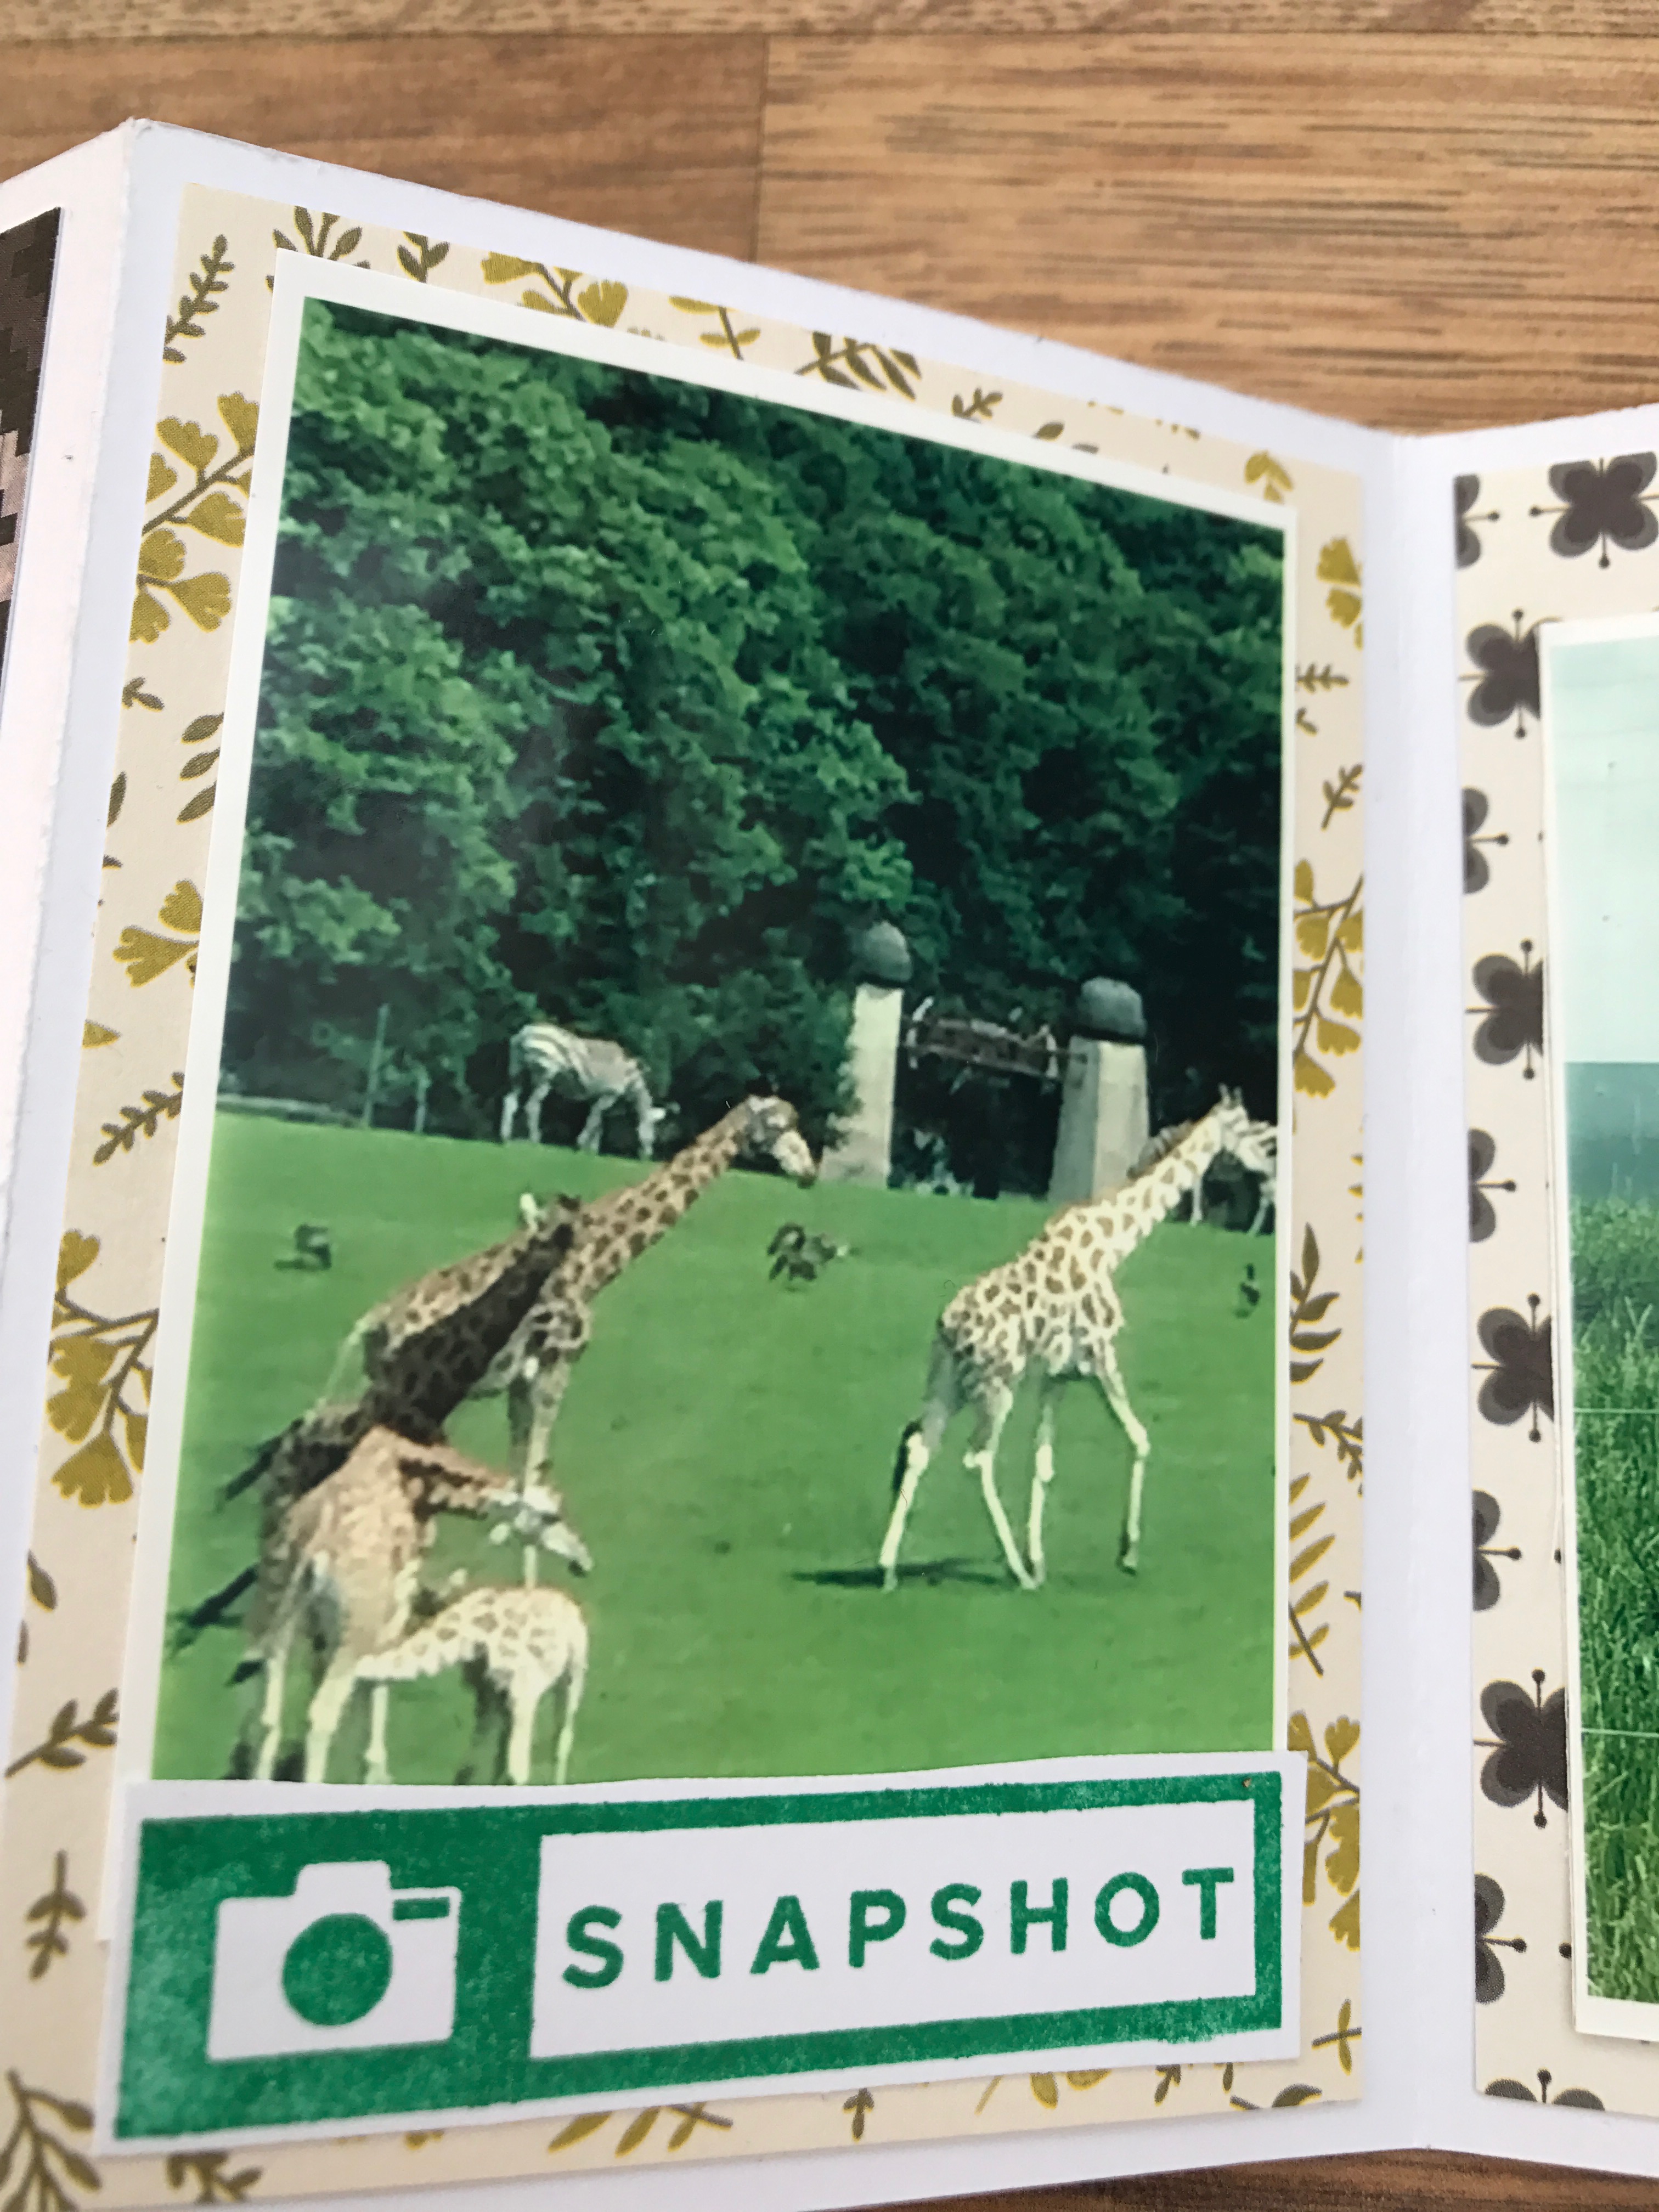
I used a 1 inch circle punch with the 6×6 cut apart paper to add a few of the saying to alternative photographs.

For my journalling spot, I used the stamp set from Shimelle.

I decorated the front and also the base which is No. 4 and helps cover the join of the two cardstock and hold the twine in place.

I kept the album decoration to a minimum as it was already bulky I didn’t want to add more bulk to it.
I got the file folder for the album from the silhouette store. The one I used I had to adapt as I wanted it be have some depth, but I think there are ones that can just be cut out without adapting.

I decorated the front the file folder with the same patterned papers that I’d used to layer under the photograph of the right.
For the title I used the Thickers from the collection, and added some mini alphas from my stash.
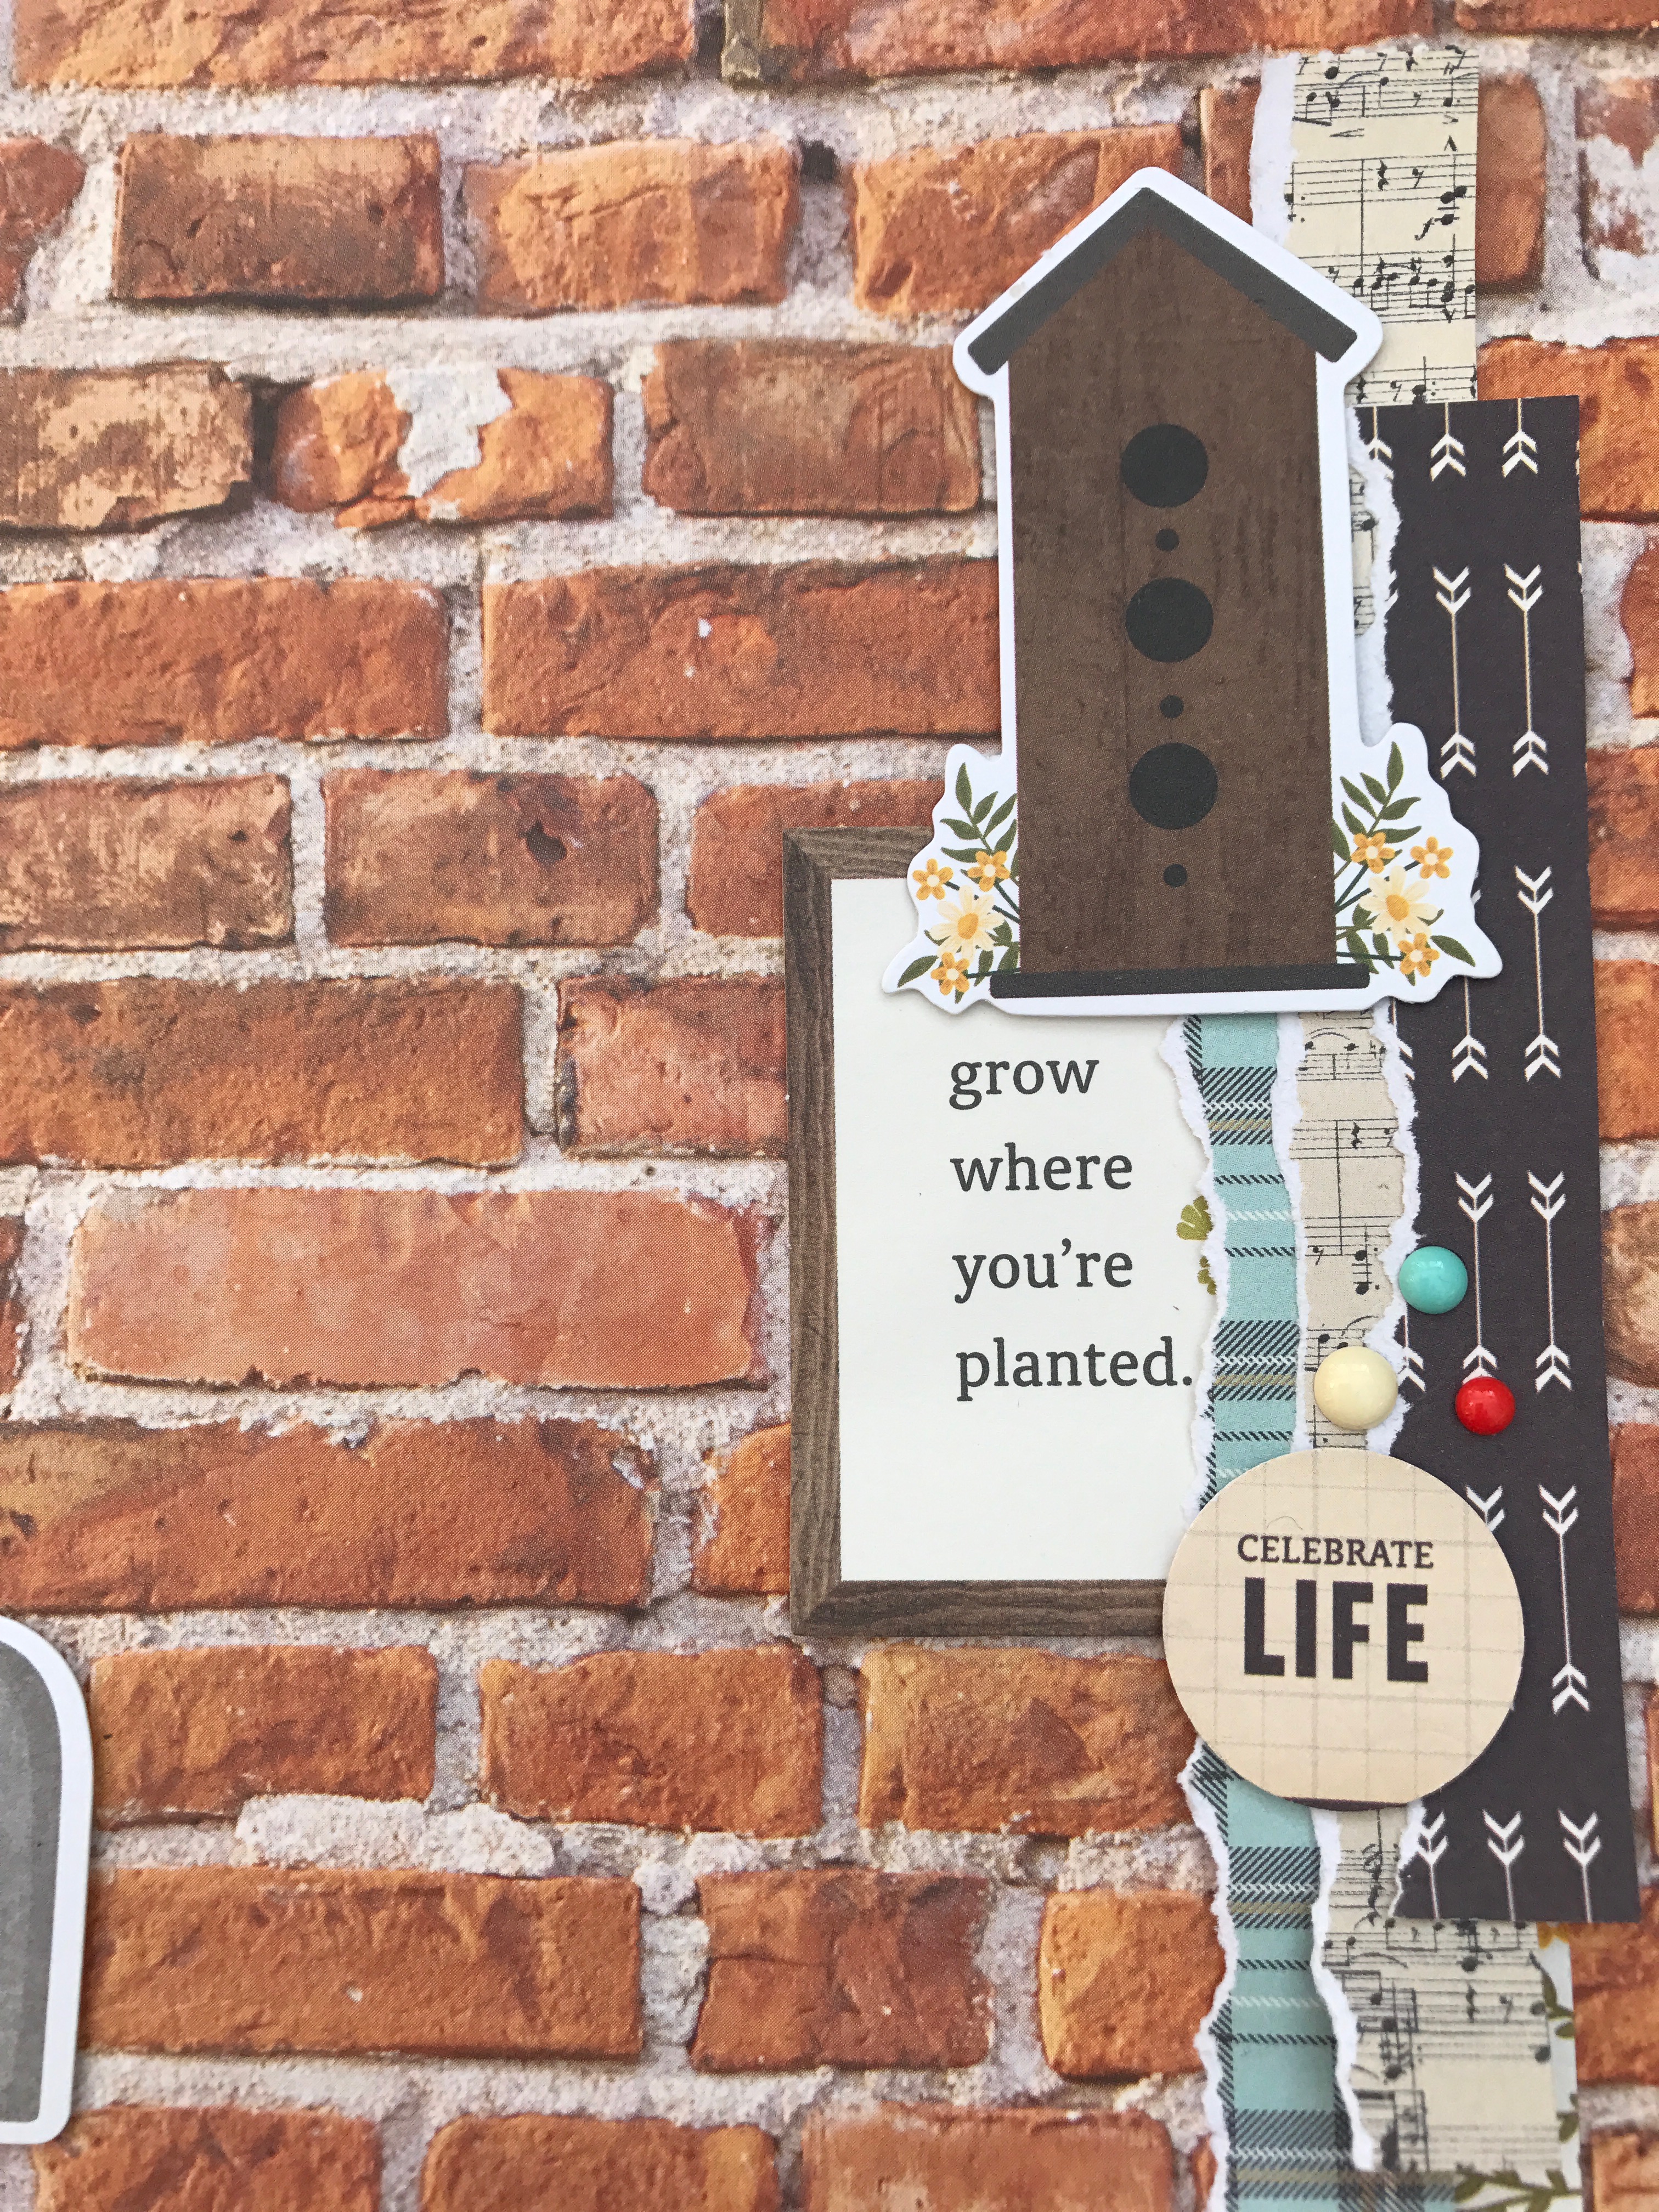
For my 2nd layout, Love You … I love the brick wall paper, t looks so real.

I started by adding white texture paste throught a stencil to the background around the photograph area, and using a selection of patterned papers from the 6×6 pad I layered under my photograph.
Then I selected some of the die cuts from the die cut pack.

I had stamped a few phases from the lovely Pink Fresh Studio stamp set, which where on my table so I just added to one of my clusters next to the photograph.

And I finished my added a small detail of the same pattern papers to the right hand side of the layout.
These are the products I used
Pebbles/Jen Hadfield – Simple Life – 6×6 pad
Pebbles/Jen Hadfield – Simple Life – Arrow Paper
Pebbles/Jen Hadfield – Simple Life – Brick Paper
Pebbles/Jen Hadfield – Simple Life – Perfect Plaid Paper
Pebbles/Jen Hadfield – Simple Life – Word Stickers
Pebbles/ Jen Hadfield – Simple Life – Thickers
Pebbles/Jen Hadfield – Simple Life – Magnolia Paper
Pebbles/Jen Hadfield – Simple Life – Die Cut Ephemera
Pink Fresh Studio – Clear Stamps – Snap Shot
Kelly Purkey – Clear Stamps – Daily Life
I hope you can see the possibilities of this lovely collection and don’t pass it by like I did the first time.
Thanks for stopping by, till next time.
